Setting up a virtual phone system is easy—it takes just three steps and less than 15 minutes.
Sure, you can spend a lot longer getting every detail perfect, but there’s no need. From choosing a provider to configuring basic settings, we’ll cover everything you need to do now and what you can optimize as you go.
What is a Virtual Phone System?
Virtual phone systems make it possible to make and receive calls over the internet instead of a physical landline.
You’ll be able to manage calls anywhere with an internet connection, rather than being tied to your desk. This is the cheapest and fastest way to set up a business phone system, as it doesn’t require additional hardware or complex installations.
Virtual phone systems use VoIP (voice over internet protocol) technology, which converts phone calls into digital packets that travel through the internet. The best virtual phone systems also come with additional communication tools for business use, like video calls, SMS, team chat, online faxing, and more.
How to Set Up a Virtual Phone System (No Hardware Required)
RingCentral is our favorite way to set up a virtual phone system. You can sign up in minutes for $20 per month, and you won’t have to purchase any hardware.
The entry-level plan has everything you need, including unlimited voice and video calling, toll-free numbers, local numbers, voicemail, texting, team chat, and so much more. Whether you need a phone system to support remote work, hybrid work, traditional office environments, or something in between, RingCentral makes it easy to get started and onboard your entire team.
If you want something simpler, Ooma is an excellent alternative at the same price point.
For the purpose of this guide, we’ll walk you through the steps of setting up a virtual phone system with RingCentral.
But the process is essentially the same, no matter what business phone provider you choose.
Step 1 — Create a Virtual Phone Number
Head to RingCentral’s website and sign up for a free trial. You’ll immediately be able to choose the number you want. You can get either a local or toll-free number–both are free, but you can only pick one or the other.
*Once you’ve finished setting up your account, you’ll be able to purchase vanity numbers and/or additional phone numbers inside the RingCentral dashboard if you’d like.
For most businesses, starting with a local number is sufficient. You can always add toll-free numbers or get additional phone numbers in different locations down the road.
Alternatively, if you already have a business phone number that you want to keep, you can port it to RingCentral for free. If that’s the route you want to go, do NOT cancel your existing plan. You’ll first need to sign up for RingCentral and begin the transfer process by submitting an online form via your admin dashboard.
Note that only the person who owns the existing phone number and is listed on the bill can submit this form. Once you’ve submitted it, wait for the process to complete before cancelling your current plan.
Step 2 — Configure Your System Settings—Greetings, Extensions, IVR
By now, your number is already live and ready to use. But there are a few things you should set up before placing calls or posting your number online.
This will only take about five or ten minutes.
Start by setting up your voicemail. From your admin page, click Settings > Phone > Call rules and voicemail.
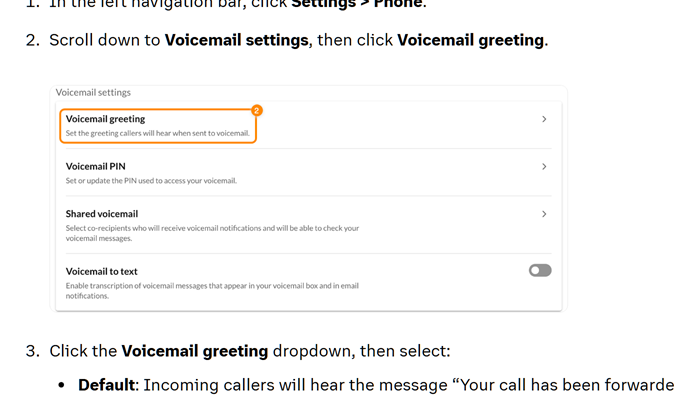
Here, you’ll be able to record a custom greeting, set your voicemail PIN, and decide how many rings you want before callers are sent to voicemail.
From this same screen, you can set your business hours to ensure you won’t be bothered by calls after hours, weekends, or holidays (unless you want to). You can decide whether to automatically forward after-hours calls to voicemail or an emergency line.
You should also set up extensions—either to other users or departments (like sales or support).
All of this can be managed under Settings > Extensions.
For now, you can start with just one extension to keep things simple. Then you’ll know how to add more as you onboard new users later on.
If you want, you can set up call forwarding if the extension dialed is unreachable. Your own number is a good option for now, but you can change it from this same place at any time.
From this same screen, you can set up business hours for each extension as long as you have admin privileges. Users of those extensions can also update this if they’d like to so you don’t have to worry about it now if you don’t want to.
If you stop here and want to start using your phone system, you’ll be fine.
But we also recommend setting up a call flow. It takes a few minutes but ensures that calls are always routed to the right user, team, or extension.
From your admin page, go to Company Settings > Phone Systems > Edit (next to Company Call Handling).
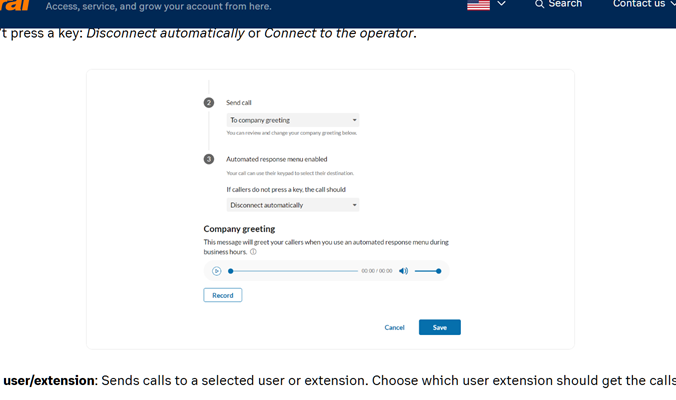
Here, you’ll be able to set different rules for different times of day, different callers, when to play custom greetings, and more. We recommend at least setting up a custom greeting that plays any time someone calls to give a professional touch to your phone system.
If you want to take this one step further, you can set up an IVR phone menu. To access this, go to Phone System > Auto Receptionist > IVR Menus.
This integrates things like voice commands and text-to-speech into the call flow. When someone calls your business, they can be greeted by a virtual agent and then say things like “Make a payment” or “Speak to billing” to be routed appropriately. Alternatively, they can press numbers on their keypad.
Lastly, do a quick one or two-minute scan of your all your settings to ensure everything looks good.
You can always come back here next week or next month to make additional changes and further optimize your process. So, don’t overthink this too much.
Step 3 — Place (and Receive) Your First Virtual Phone Calls
Your virtual phone system is officially set up. Now you just need to test it to ensure everything is working.
Test it from your mobile and desktop devices. Be sure to place calls and receive calls to make sure it all works as it should.
From your computer, you can either access the web-based version of RingCentral or download the software to your device. The RingCentral app for Mac or Windows will ultimately provide you with the best user experience. But using your web browser is fine for now.
From your phone, you’ll need to download the RingCentral mobile app for iOS or Android.
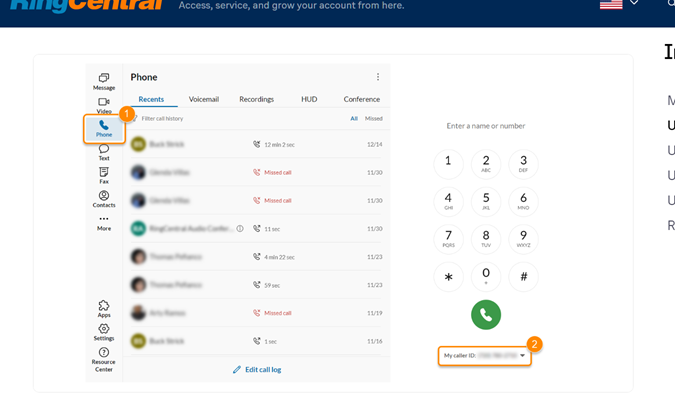
Outbound dialing is the same from both platforms. Simply click the Phone icon and then the Plus (+) button. Then dial a number or select a number from your contact list.
Then test your incoming calls and answer from both devices.
You can answer the call first, but you’ll also want to decline a call or let it go to voicemail. This is the best way to test if your voicemail and call flows are working properly.
Next Steps: Observe, Optimize, and Train
Your virtual phone system is completely set up and likely 80% where you want it to be. But you can tweak the remaining 20% in the coming weeks or months by making small changes.
The most important thing to keep an eye on is your call quality:
- Are there delays between when you speak and when the caller hears you or vice versa? This is a sign of call lag. If you suffer from this, get your provider’s support team on the phone ASAP so you can optimize your VoIP network.
- Are there crackling sounds or feedback? Are voices cutting in and out? Is the phone echoing? If callers can’t be heard or they can’t hear you, your customer’s experience will suffer.
- Are calls dropping? Are they taking longer to connect after you make a call to your phone number? Run a speed test on your internet and troubleshoot your connectivity.
You should also make sure your staff is properly trained on how to use your virtual phone system.
You can set up a video call, walking your staff through all the features you want them to be proficient in. RingCentral has everything you need to set up that video meeting.
In our experience, it’s best to be thorough. Make sure your staff is comfortable with all the features you want them to know. Get their feedback. Many people can be intimidated by learning new software but won’t speak up when they don’t understand how something works.
Do your best to make sure new and current employees feel comfortable expressing their concerns. Show your team how to find the provider’s knowledge base if you don’t have a tech support team. Make sure everyone makes and takes some mock calls and performs actions in the platform utilizing crucial features. This is a great way to ensure your team’s success and happiness when moving to a new virtual phone system.
Sign up for a 14-day free trial–you’ll be able to set up your entire virtual phone system before having to pay to see if it’s right for you.