Shopify is one of the best ecommerce platforms on the market today. Moving your site to Shopify might sound intimidating. But it’s actually simple, and you’ll be set up to scale your ecommerce store once the task is complete.
Migrating from WooCommerce, Etsy, Square, BigCommerce, or another popular platform? Shopify’s importer app will speed the process for small business. Enterprise migrations to Shopify Plus take as little as 90 days.
Keep reading to find out how to get your store on Shopify. Or check it out right now with a three-day free trial of Shopify, no credit card required.
Why Transferring a Website to Shopify is Worth It
As an all-in-one ecommerce platform, Shopify has everything you need to sell online from a single provider. This is much easier than having to worry about web hosting, shopping cart software, inventory management, and a payment gateway from multiple providers. For brick-and-mortar businesses expanding to ecommerce, Shopify even has a retail POS system that integrates with your online store.
Shopify is built specifically for selling online, which can’t be said for other CMS platforms. This means that everything about your site will be optimized for selling, including your product catalogs and pricing pages. See why Shopify is a leader among the best ecommerce website builders.
If you’re selling just one or two products online, you might not need a full-blown ecommerce platform. But if you want to scale your online store and continue adding hundreds or thousands of products, adding a shopping cart plugin to your existing site won’t be enough to get the job done.
Once you’ve moved to Shopify, all of the backend management gets easier as well. You’ll have access to insightful analytics related to how your site is performing, which products are doing the best, and where people are abandoning purchases. Shopify even has a built-in email marketing platform that’s free with all plans.
If scalability and simplicity is your goal, Shopify is a no-brainer. You can get everything you need from a single platform, making your life much easier. Shopify is also built for limitless growth, so you’ll never outgrow the platform.
The Investment Needed to Transfer a Website to Shopify
You’ll need to keep your existing website up and running while you make the switch. So you’ll still have to pay for your current CMS or website builder, in addition to your hosting costs, domain name fees, and other site maintenance fees. You can likely end most of these ongoing subscriptions within a month or so of the transfer.
In addition to your existing costs, you’ll need to sign up for a Shopify plan. These start at just $39 per month, and you can save money by pre-paying for the year, which brings it down to $29 per month.

There are two other packages to choose from—Shopify and Advanced, starting at $105 and $399 per month, respectively. The processing rates are cheaper at each tier, and you’ll also have access to discounted shipping rates. High-volume merchants that need an enterprise-grade solution should consider Shopify Plus, starting at $2,000 per month.
Depending on the size of your existing website, you should be able to complete the transfer in less than a week. In many cases, you can knock out the entire transfer within a few days.
The actual migration cost is free if you do it on your own. Alternatively, you can hire a Shopify expert to handle everything for you. Pricing from quality experts typically ranges from $500 to $5,000, depending on the complexity of your existing store.
9 Steps to Transfer a Website to Shopify
Ready to get started? Just follow the simple steps below, and your site will be transferred to Shopify in no time.
1 – Backup and Export Your Existing Website Data
Before you start migrating data or making changes to your website, you need to make sure you have a recent backup of everything.
Sometimes, things can go awry when you’re transferring data and pointing URLs to new destinations. You want to make sure your existing site stays up during the process. Otherwise, you could lose out on sales or have disappointed customers that can’t reach you.
So having a backup of everything from the beginning will help put your mind at ease. Even if something goes wrong and data gets deleted, you’ll have the backup ready.
Once everything is backed up, either locally or to the cloud, you need to export all of your product data, customer information, orders, reviews, blogs, store credits, gift cards, and landing pages.
The exact export steps will look a little bit different for everyone, depending on your current CMS platform. But whether you’re using WordPress, Wix, Squarespace, or another ecommerce site, there should be pretty clear instructions for going through this process. It usually only takes one or two clicks.
Start with your products and customers. This will usually be the easiest, and you can usually export that data as CSV files. Choosing this format will also make things easier when you’re importing that data to Shopify.
2 – Set Up Your New Shopify Account
Next, you need to sign up for Shopify and create an account. I’d recommend jumping straight into a paid subscription if you’re going through the full process. But you could always sign up for a three-day free trial if you just want to get your feet wet without doing a full transfer.
Most of you will be fine with a Basic or Shopify package, starting at $39 and $105 per month, respectively. If you’re already running a larger store with more than five inventory locations and over six staff accounts, you’ll need to sign up for an Advanced subscription.
There are several prompts during the sign-up process that will guide you in the right direction during the setup.

For example, if you answer the first question saying that you’re already selling online or in person, the second question will ask if you’re moving an existing site to Shopify.

The prompts change based on your response to the previous question.
You’ll have the option to select the platform you’re moving from as well. Examples include:
- Amazon
- eBay
- WordPress
- Squarespace
- ShopKeep
- Square
- WooCommerce
- Etsy
- BigCommerce
- Lightspeed
- OpenCart
- PrestaShop
- Volusion
You should also set up all of your administrative settings, staff accounts, billing information, and basic details during this step.
3 – Import Your Data to Shopify
Once your account has been set up and verified, you can import the data you’ve previously exported back in step one. You’ll have to import each type of content separately, and there are several options for each.
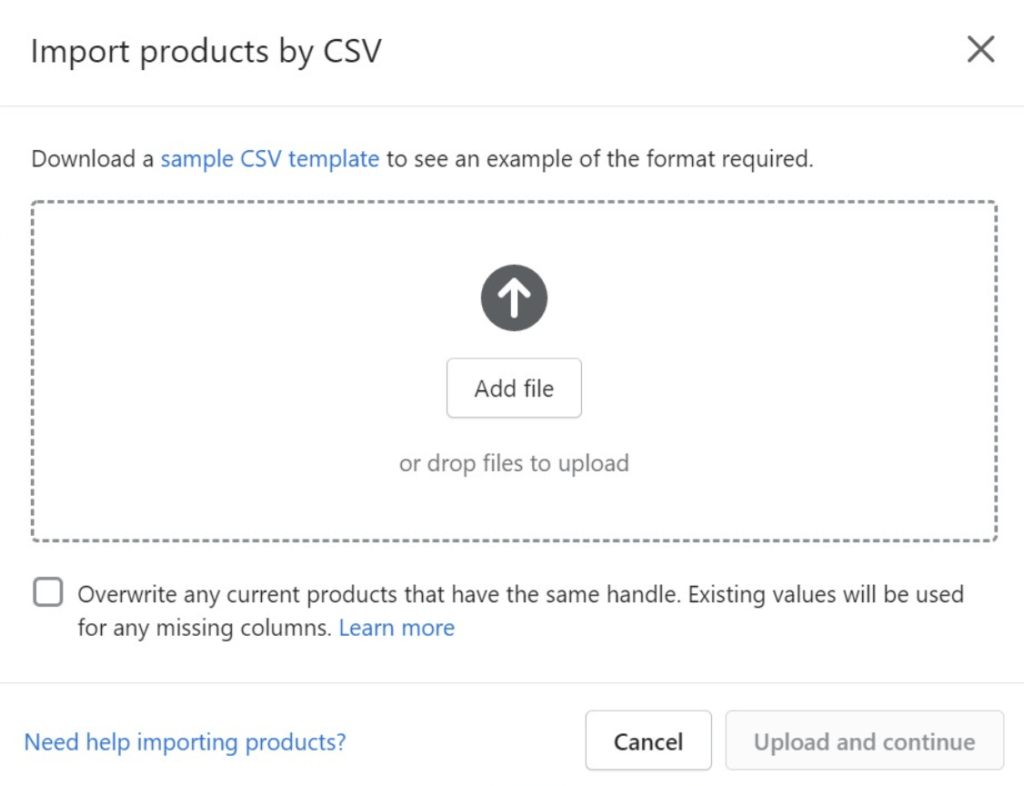
In some cases, you might decide to just copy and paste landing page content from your old site to Shopify. Or you can transfer data manually using CSV files—although this option only works for customer information and products. CSV file migrations do not support customer passwords.
Head to your admin dashboard and select Products from the left sidebar. Then click the Import button within the All Products menu.
If you have developer resources in-house, you can also import data using an API connection. But for most DIY users, that’s probably not worth attempting.
In terms of importance hierarchy, you’ll want to start with product data, customer information, and historical orders. Completing the imports in this order ensures you have full access to customer transaction history, with previous orders linked to the appropriate items and customers.
4 – Organize Your Product Catalog
Don’t assume that everything has been migrated perfectly after the data import. You still need to go through everything to confirm the accuracy.
Sometimes the CSV export doesn’t align exactly with Shopify’s import guidelines. You should double-check things like product descriptions, product variants, meta descriptions, and images.
From here, you can create collections within your product catalog to group similar products into categories. There are two types of collections you can create—manual or automated.
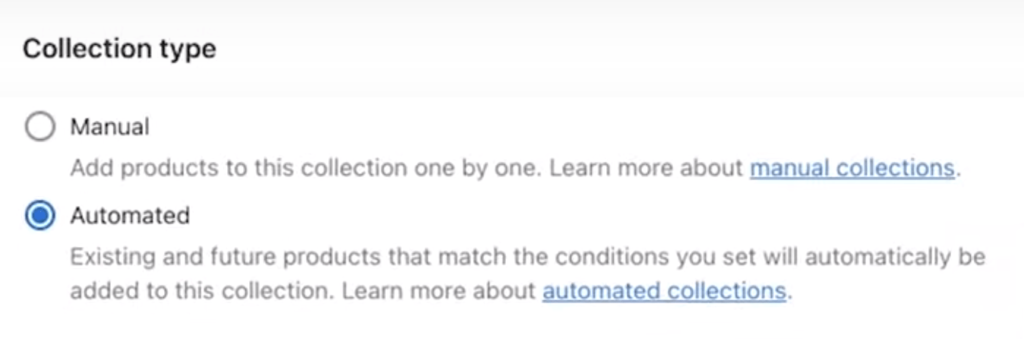
A manual collection requires you to add each product one by one. But automated collections let you group existing and future products into a group based on specific conditions.
Examples of conditions include price, tag, color, sale items, and more.
Once you’ve added a collection, you have the option to add them to your store’s navigation menu. This makes it easier for customers to quickly find different product categories.
5 – Configure Your Domain on Shopify
Now you need to set up your Shopify domain.
There are two options to consider here. You can either purchase a new domain or transfer your existing domain to Shopify. Most of you will likely choose the latter, but there are some one-off instances where you may just want a new domain altogether.
For example, let’s say you were previously using a website builder that had a subdomain in your URL. You’d obviously want to eliminate that once you transfer your site to Shopify.
You can purchase new domains directly through Shopify.

Alternatively, you can purchase a domain from a registrar service of your choice. Although getting a domain directly from Shopify is typically the easiest choice.
If you already own a domain from another provider, you just need to connect it to Shopify from that third party. All of your domain settings and renewal options will still be managed and maintained outside of Shopify.
6 – Enable Payments
Making sure you can receive payments from customers is obviously a top priority for every ecommerce business.
You have two options. One, you can just use Shopify Payments for built-in processing. Two, you can use a third-party payment provider that’s supported by Shopify.

Online processing rates for Shopify Payments vary based on your plan.
- Basic — 2.9% + $0.30 per transaction
- Shopify — 2.6% + $0.30 per transaction
- Advanced — 2.4% + $0.30 per transaction
High-volume merchants could easily justify a higher-tiered plan just for payment processing savings.
7 – Set Up Your Sales Taxation
Shopify makes it really easy for you to configure your sales taxes. This is something that can be a headache for some merchants if they’re not using the right software.
Depending on your location, there are different laws and guidelines about sales tax for your products. It can also depend on the location of where the products are being shipped, and you may owe taxes in multiple states.
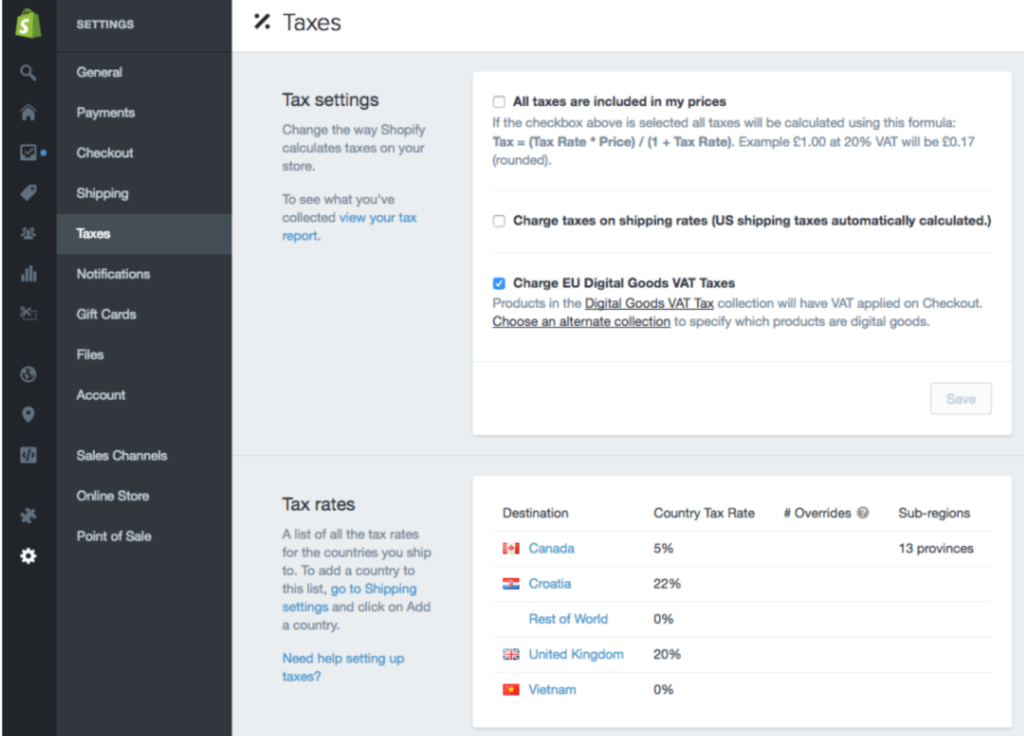
Shopify will automatically apply tax rates to different shipping zones.
To help you keep track of your taxes throughout the year, you can also integrate an accounting application from the Shopify Marketplace into your website. You’ll see options like Quickbooks, Xero, Sage, and other popular accounting tools to choose from.
8 – Get Your URL Live and Set Up Redirects
Now you’re ready for the site to go live.
It’s just a matter of pointing your domain to your Shopify store. Head over to your domain registrar and edit this option in your DNS settings.
Shopify has a video that explains this connection process in greater detail. You can use this as a reference to help you with this step.
The changes are usually made within a few hours, as DNS servers don’t update in real time. So you need to wait until the DNS server spots these changes.
You might see a change on your end, but an employee or someone else visiting your site might not see it yet. This is completely normal and nothing to worry about within the first few hours.
For the cleanest possible transition, it’s in your best interest to do this during hours when traffic is at its lowest. So if you’re a US-based ecommerce store, doing this between the hours of 2 AM and 5 AM is probably your best bet.
9 – Power Down Your Old Site (After A While)
Don’t immediately power down or delete your old site.
Make sure the transition has been smooth for at least a month. You may ultimately wait to export certain content, like old blog posts or low-traffic landing pages.
But once you’re confident that your new site is all set and you’ll never need to access the old one, you can go ahead and cancel it.
Canceling your subscription is the easiest option, as the platform will likely power everything down for you, as opposed to manually powering things off on your own.
Next Steps
Now that you’ve transferred your website to Shopify, there are a few other opportunities for you to go after.
First, check out our guide on 20 tips to double your ecommerce conversion rate. This will help ensure your Shopify site is primed to convert from day one, so you can start selling immediately.
I also recommend reading our complete guide to how Shopify works. It’s filled with tips, tricks, and best practices for getting the most out of your Shopify subscription. You’ll also learn more about the different features and functionality available within Shopify.
If you’re still on the fence about whether or not Shopify is right for you, our full Shopify review can help you decide. You can also check out our list of the best ecommerce platforms and software to see where Shopify stacks up against other tools in this category.