There are many reasons to migrate your website to a new web host. Maybe you’re experiencing more downtime than you should be, unhappy with your website loading speed, or on the verge of outgrowing your current provider’s resources.
Regardless of the reason, your new web host should facilitate a smooth migration with no interruption to your day-to-day operations. With a provider like Hostinger, you get free professional migration with all of their hosting plans, plus an intuitive hosting management dashboard, fast load times, and a 99.9% uptime guarantee.
Crazy Egg’s Favorite Tools for Migrating Your Website
When attempting to migrate your site to a new web host, it’s important to find a quality new home for your website that will both offer improved hosting and make the migration process a breeze. Take a look below at our three favorite hosting providers for migration:
Hostinger delivers free professional migration alongside its incredibly affordable hosting plans. Try Hostinger web hosting risk-free with a 30-day money-back guarantee.
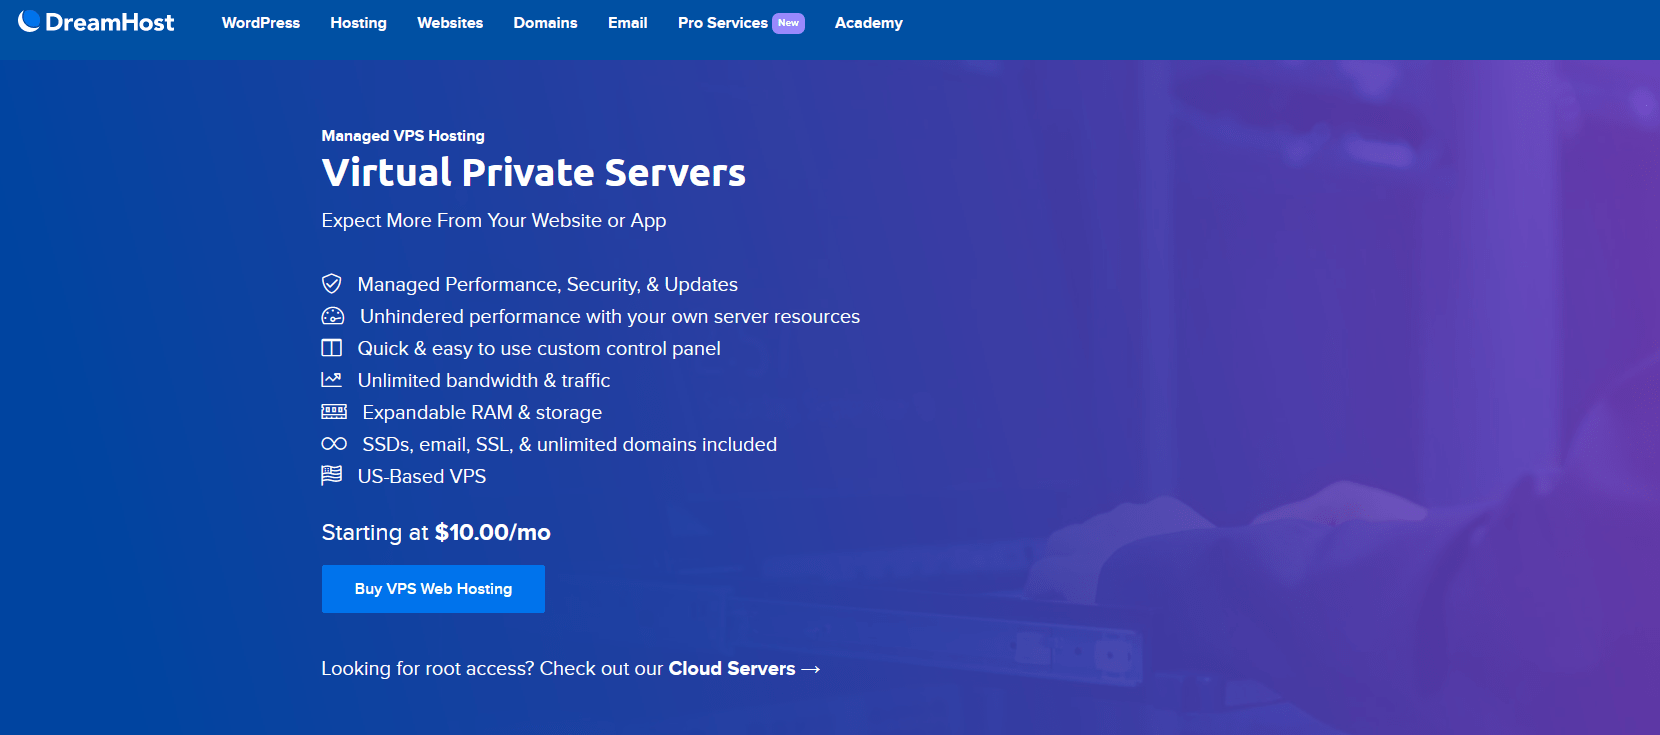
DreamHost is a WordPress-recommended hosting provider that provides a free plugin to let you migrate your WordPress site without any interruptions. Sign up for DreamHost and get a deal on hosting, pro services, or a new domain.
SiteGround is one of the most reliable web hosts around with its 99.9% uptime guarantee, plus free professional migration on select plans. Select a SiteGround plan today and get 80% off regular rates.
More Top Web Hosting Services
The three options above are our Golden Eggs, our top picks in the world of web hosting. But they are hardly alone—the number of web hosting providers on the market is enough to make your head spin. Fortunately, we’ve done the heavy lifting of researching them for you. Check out our post on the best web hosting services to get reviews of the top providers and advice on how to pick the right one.
Step 1 – Get Started with Hostinger
We at Crazy Egg rate Hostinger highly as a hosting provider. It’s a killer combination of affordability, reliability, and features you’d have to pay more to get from others. More importantly for this guide, Hostinger offers free professional migration.
First, you’ll need to head to Hostinger’s website and choose a plan. There is a range of options, from cheap shared plans for one website to robust VPS hosting packages.
For the purposes of this post, we’ll go with their most popular offering: the Premium Shared Hosting plan. When you’ve selected your plan, just click Add to Cart to initiate the checkout and sign-up process.
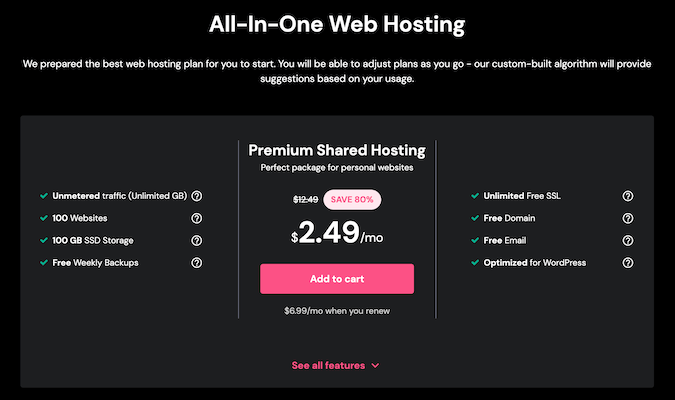
Like most web hosts, Hostinger offers a low introductory price. However, the price goes up when it’s time to renew your plan. The great thing is that Hostinger offers transparent pricing. You can see clearly upfront that the Premium Shared Hosting plan starts at $2.49 per month, then renews at $6.99 per month.
When you add a plan to your cart, Hostinger will then present initial commitment options for that plan. Choosing a longer contract term will give you the most value for money.
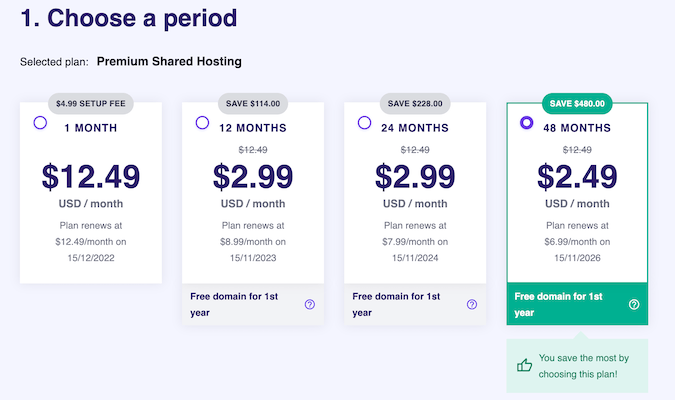
You can choose from terms ranging from one month (resulting in month-to-month billing) to 12, 24, or 48-month contracts. As you see in the image above, the solid promotional rate is only available when you pay for four years of hosting upfront. That means you lock in a great price point, but you’ll need to pay just shy of $120 at checkout.
Hostinger also offers a free domain for the first year on some plan options, starting with the 12-month term.
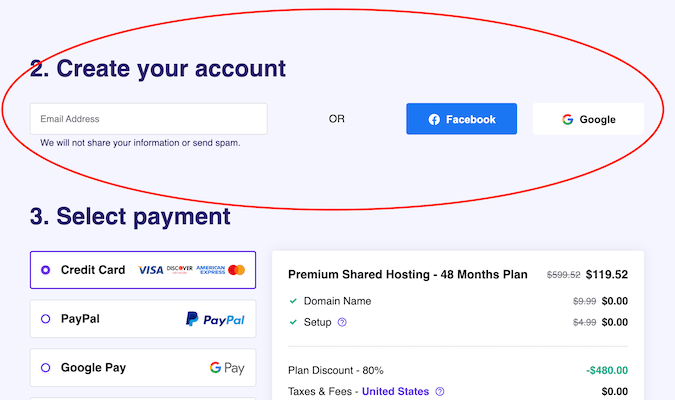
On the same page, scroll down to enter your email address or sign up for a Hostinger account with your Facebook or Google account.
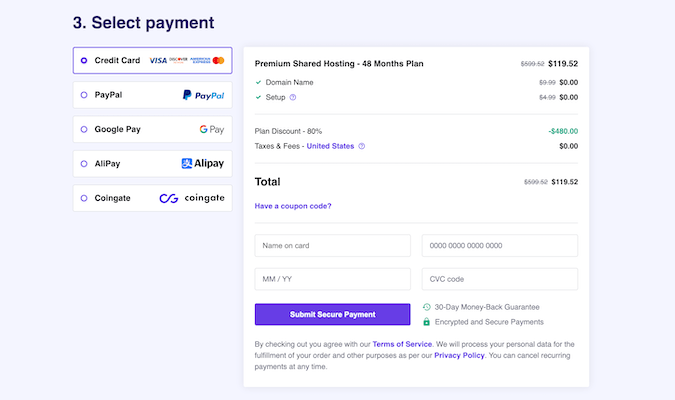
Finally, enter your payment details and click Submit Secure Payment to complete the purchase.
It’s worth noting that the process is similar regardless of the web host you’re migrating to. Most other hosting providers offer a similar checkout process, including variable rates based on your initial term commitment.
Step 2 – Submit a Migration Request
Most web hosts offer professional migration, but be aware that many charge you for handling the migration for you. You don’t have to worry about that with Hostinger since they offer managed migration free of charge.
Hostinger will ask you if you require migration during the initial setup, allowing you to opt into their migration service while you’re getting all the details taken care of. Or, you can request the migration after going through the first-time setup process by going into your Hostinger account dashboard.
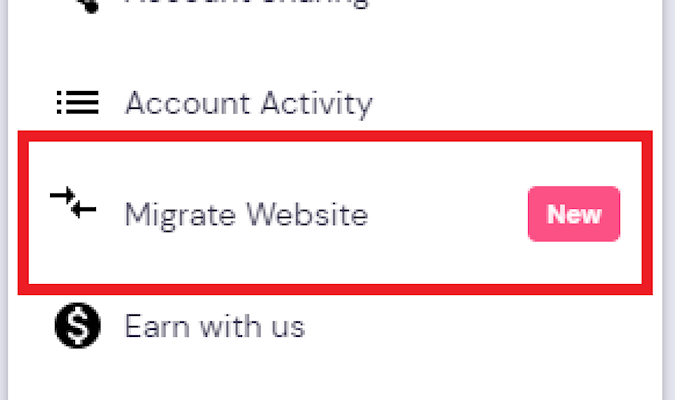
To do this, log into your Hostinger account. Next, click the Profile icon on the top right of your screen.

From the drop-down menu that appears, click Migrate Website.
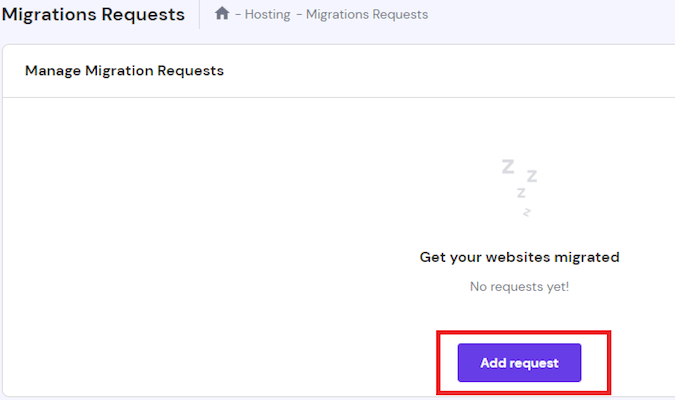
You’ll be greeted with a mostly blank screen (unless you’ve requested a migration from this Hostinger account before). In the middle of that screen, click Add request to initiate a migration request. This prompts Hostinger to create a migration request form and add it to their support queue.
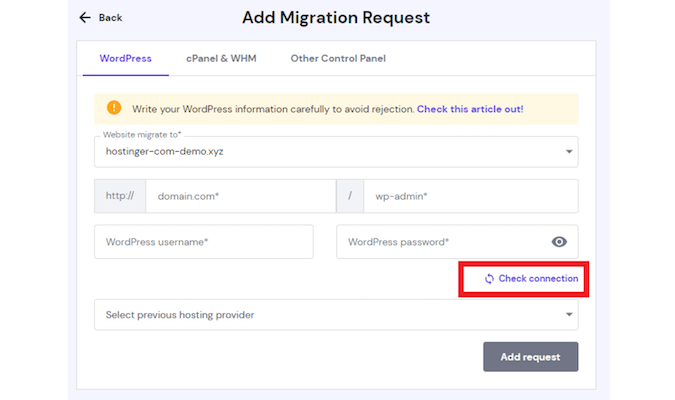
The next step is key. You’ll need to select the type of control panel you use on the host you’re migrating from. Check your current provider if you’re unsure. You’ll see in the Hostinger interface there are options for WordPress, cPanel/WHM, and other control panel configurations.
Once you’ve determined what your old host’s control panel is, click on the appropriate tab in the Hostinger migration interface. Add your credentials for the hosting account you’re migrating from into the provided fields and then click Check connection.
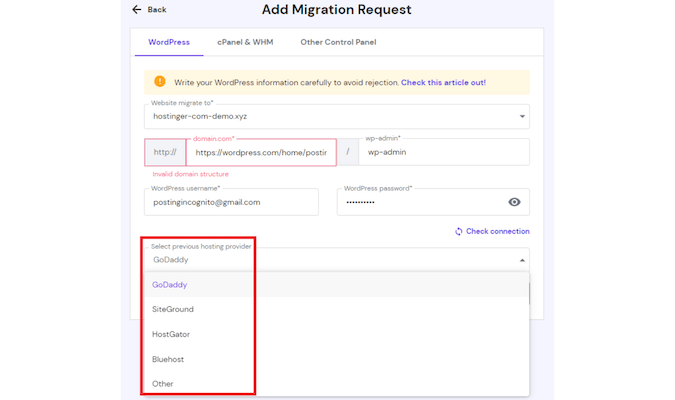
Hostinger will check your information to ensure that the credentials are correct and, if everything checks out, choose your current hosting provider from the drop-down menu and click Add request.
It takes less than 48 hours to transfer your website to Hostinger, which is wonderfully fast for a free service.
You’ll receive an email notification once the transfer is complete. You can also check the migration status by clicking the Manage Migrations Requests tab when you go back to the Migrate Website section of your profile. This section will also list the next steps to take in case your migration is unsuccessful.
If your migration is successful, congratulations! You can skip all the way down to Step 7.
However, if you don’t go with Hostinger or you have any other reason to migrate manually, read on for a few steps on how to accomplish that.
Step 3 – Export Your Website Files (for Manual Migration)
Not all hosts offer free migration—some charge around $100 for handling it for you—or even managed migrations at all. In this case, you’ll likely want to handle this manually.
To start, you’ll need to transfer your website files to a new host. You should be able to maintain your site’s functionality, content, themes, and plugins as long as you do not tamper with the site files after download. This process looks different depending on your current host.
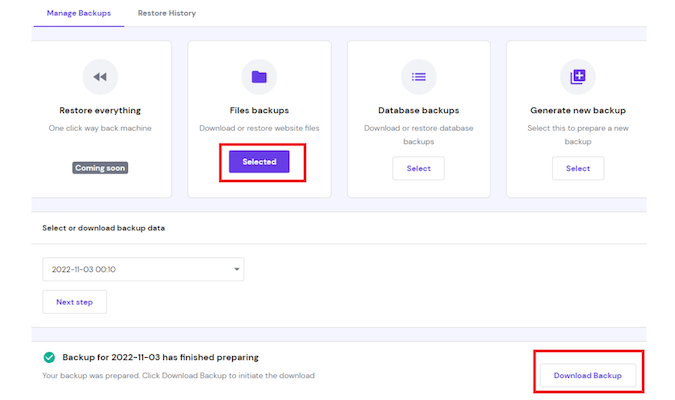
You should be able to download your website backup files from your cPanel. Just be sure to download the most recent backup. Refer to your hosting provider’s knowledge base for the exact steps for downloading your site files. You can see an example of where you can find and download these backups below (which shows the interface in Hostinger).
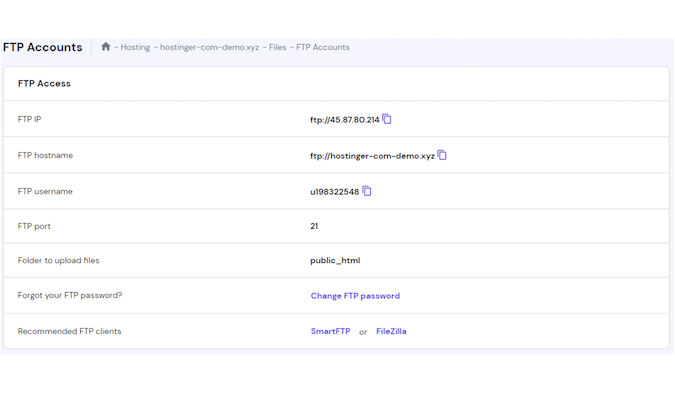
Alternatively, you can manually export your website files with a File Transfer Protocol (FTP) tool. FileZilla is a terrific option and is free to use. You’ll just need to create an FTP account in FileZilla using your hosting account’s FTP details.
You can find these details in your hosting provider’s control panel by looking for a section for FTP accounts. Below is what it looks like in Hostinger’s hPanel (Hostinger’s proprietary version of cPanel).
Again, consult your host’s knowledge base or support for how to connect to an FTP host. Once you have them connected, you can download your website files from FileZilla onto your computer.
Step 4 – Download the Website Database Backups
You’ll also need to download your database backup. The database backup, which contains your website’s settings and content, is different from your website files.
Most content management systems (CMS) like Joomla, WordPress, and Magento have a database. However, static HTML websites do not have a database. If your website is static HTML, you may skip this step.
Those CMS platforms tend to make it easy to export your database. Alternatively, you can often find a way to do that through your web host’s dashboard as well. In Hostinger, for example, you can find it by clicking through Files > Backups > Database backups within hPanel.
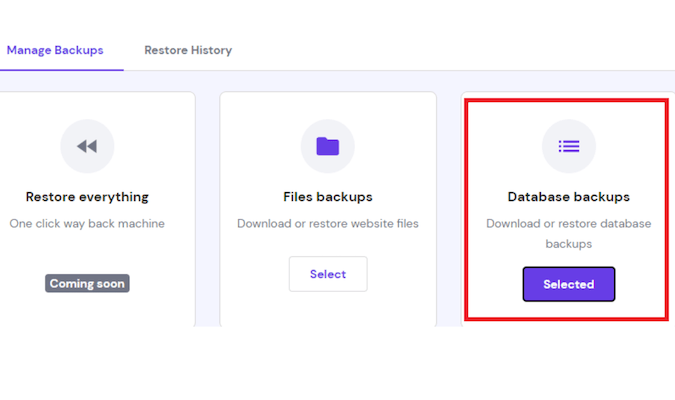
Select the data to download and click Download to transfer the ZIP file of your database backup to your computer.
Step 5 – Transfer Your Website Files and Database Backup
First, remember to unzip your website files. You won’t be able to upload a ZIP to your new host.
Next, connect your new hosting account to your FTP client, such as FileZilla. It will help you upload your files to the new hosting provider.
While your FTP client can handle uploading your website files, you’ll need to go into your host’s dashboard to upload your database backup.
First, create a new database with the new host. This will differ between providers, so you can refer to their tutorials or support for guidance.
Using Hostinger’s interface as an example, you can find a section for databases by going into your site section of hPanel. Then, find MySQL Databases and click New Database.
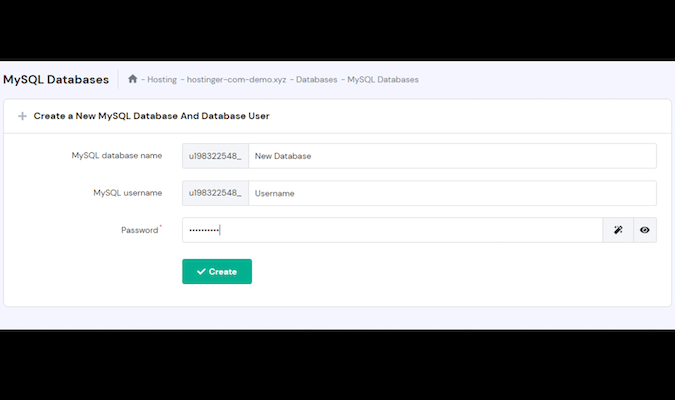
Consider retaining the same database name, username, and password from your old host. It will make it easier to remember your credentials, and you won’t have to update the database configuration settings.
The last step here is to go to phpMyAdmin from within your new hosting account. Then, select the new database you created and import it.
Step 6 – Update Configuration Details
You may need to change the configuration settings depending on your CMS. For example, WordPress websites are notorious for requiring wp-config.php file updates. But, again, you can refer to your CMS’s knowledge base for the precise configuration steps after migrating a website.
Don’t forget to test your website afterward, too. Ideally, the website shouldn’t experience downtime when switching between hosts. Just ensure there are no new errors or issues when the site goes live on your new hosting provider. This is just generally a good time to make sure all went smoothly, checking both the front and backends to ensure that the settings match your website’s specifications and taking some time to get familiar with your new host’s dashboard and control panel.
Step 7 – Point Your Domain to Hostinger’s Servers
The last part of the process is to change your current nameserver to your new web host’s nameservers. This step ensures that you can use your domain with your hosting plan and that anyone entering that URL will arrive at your website.
Wait until you get the confirmation email that the migration is successful before pointing your domain. You’ll need to change the nameserver to Hostinger’s. The Hostinger nameservers will depend on your hosting plan.
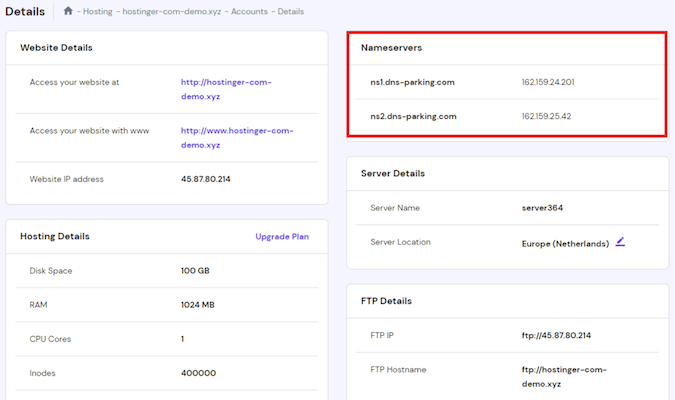
For example, nameservers for Hostinger’s shared and cloud hosting plans are:
- ns1.dns-parking.com
- ns2.dns-parking.com
While the nameservers for Hostinger’s cPanel hosting plans include:
- cdns1.main-hosting.eu
- cdns2.main-hosting.eu
You can also confirm the correct nameserver by navigating to your Hostinger dashboard and clicking Manage next to your hosting plan. Then, click See Details under the hosting plan to view nameserver details.
You can only point to the Hostinger nameserver from your domain registrar’s account. The changes take between 24 and 48 hours to take effect.
Once you have the nameserver information from Hostinger, log into your domain registrar’s domain management page. Then, click on the registered domain name you want to point to the new host’s nameserver.
You should see options to click, like Nameservers or Host Address. Click on the appropriate button to edit the nameserver to point to Hostinger’s servers. You can also contact support or refer to your domain registrar’s knowledge base for the specific steps of updating your nameserver.
Finally, don’t forget to save your changes. And, with that, you have successfully transferred your website to a new host!