Google Workspace (formerly Google Suite) is the collection of insanely popular tools from everyone’s favorite search engine. Gmail, Sheets, Calendar, Meet, Drive–like millions of other people, we use these tools all the time at Crazy Egg. In this post we’ll show you exactly how to start using Google Workspace.
Google Workspace Compared to the Best Project Management Software
Although we have nothing but great things to say about Google Workspace, most managers will want to track projects in a separate platform. Many of the best project management tools integrate seamlessly with Google Workspace and give managers the visibility they need to stay organized. Our top picks are:
- Monday.com – Best for project management software for most
- ClickUp – Best remote work platform
- Smartsheet – Best for flexibility
- Teamwork – Best for client and service-based businesses
- Asana – Best balance of power and simplicity
- Trello – Best Kanban project management
Read our full review of the best project management software to see how these tools work together with Google Workspace to keep costs low and create efficiencies in your everyday processes. Google is a great backbone for any of these platforms.
Why Google Suite Project Management Is Worth It
Google Workspace (formerly known as Google Suite) is a simple and convenient way to supplement the way you organize tasks and projects. Best of all, it plays nicely with other tools you’re already using for project management.
If you have to manage remote employees, Google Workspace will help you get the most out of their output and collaboration efforts. All of the apps within Google Workspace are cloud-based, so people can access them from anywhere. Plus, apps like Drive, Currents, Docs, Slides, and Sheets all support team collaboration and allow everyone to contribute within folders and documents.
You’ll also be able to hop on video calls, send messages via Chat, and share your screen to present information to teammates. All of this can be handled with a click of a button.
Gmail and Drive are the two main pillars of Google Workspace. Both simplify communication and help keep everyone organized. Gone are the days of chasing people down to make sure they know what’s going on and have access to the appropriate files.
Overall, these simple collaboration tools help keep projects on track and on time.
It’s also really easy to learn how to use Docs, Sheets, and Slides. Just about everyone has experience with the Microsoft alternatives of these tools, so there’s virtually no learning curve.
Google offers Currents as an internal communication tool, similar to Slack or Basecamp. But Google Currents lets you engage with your employees in new and dynamic ways. You can communicate new ideas, share valuable insights, and gather input through clear and meaningful discussions in real time. This app helps build very productive environments where everyone can communicate and stay on the same page.
If you want to manage multiple projects within a platform that is familiar and caters to efficient project management, Google Workspace is the perfect solution.
The Investment Needed to Manage Projects with Google Suite
You’ve made it this far, excellent. You’re willing to put in the work.
But before that happens, let’s talk about the investment you and your team need to make in order to collectively bend Google Workspace to do your bidding.
In terms of money, there are four pricing plans for businesses. All plans come with all 12 of Google’s Workspace apps:
- Business Starter: $6 per user per month
- Business Standard: $12 per user per month
- Business Plus: $18 per user per month
- Enterprise: Custom pricing through Google
Google bases these prices on an annual contract, meaning you need to pay for the full year up front. You also have the option of paying month to month, but you will pay 20% more over the course of the year at each tier than you do with the annual pricing plan.
The primary difference from each plan to the next is increased Drive storage and participants allowed in Meet video meetings. For example, you receive 30 GB of storage per user in the Starter plan, 2 TB of storage per user in Standard, and 5 TB of storage per user in Plus.
If you select the Enterprise tier, Google pools the storage of all your users. This allows individual users to potentially surpass 5 TB, as long as another user on your account uses less than 5 TB.
The productivity apps you use offered by Google depends on what you will need to achieve in your project. If you have a big team and have a person who only does presentations, the Slides will be the main app for them to master. But it’s common that most team members will need to become proficient with multiple Google apps.
But, don’t worry. Google is fantastic at giving you resources to walk you through how every detail works in their software.
Here at Crazy Egg, we can’t predict how long it will take you to become proficient but we can say many teams get started working together quickly.
With that said, there are some essential steps needed to become proficient when using Google Workspace as a project management platform:
- Sign up for Google Suite
- Collaborate, update projects, and track work with Google Currents
- Use group email lists
- Manage your team and project schedules on Calendar
- Hold 1-on-1 or team meetings over video on Meet
- Organize team preparation for meetings
- Generate documents and collaborate on them
- Develop impressive presentations with Google Slides
- Securely share and store digital assets
9 Steps to Managing Projects with Google Suite
Let’s talk about the simple steps every project manager should know when using Google Suite. Feel free to get rid of any step you don’t need, however, these are the most common.
#1 – Sign up for Google Suite
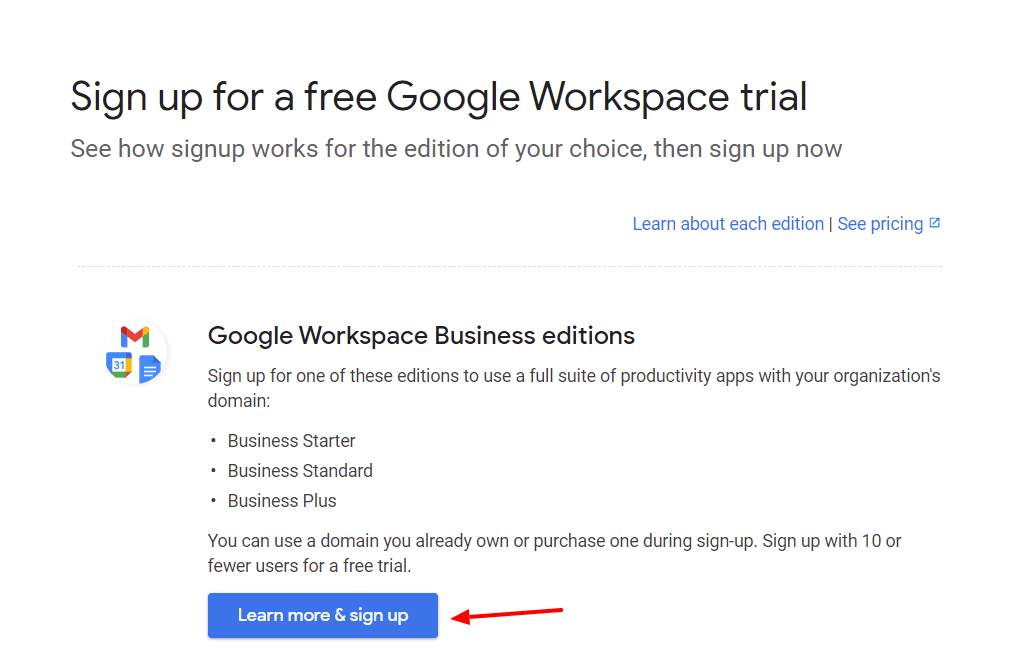
First, you need to sign up for Google Workspace before you start anything. This is simple and will give you access to all the apps needed to run your project.
- Sign up for one of the business additions. Select one of Business Starter, Business Standard, or Business Plus.
- Add your business domain. This is where you plan to use Google services.
- Add your personal username. This is the name you use to sign into your Google account
- Add an email address that’s not on your domain. This will be used if you forget how to sign into your account and Google needs to contact you.
#2 – Collaborate, Update Projects, and Track Work with Google Currents
When you are beginning a project you need a way to keep track of work and this starts with Google Currents.
This simple project management software keeps your entire team focused on what needs to be done and how things change in real time. It also lets you collaborate with people outside of your organization with private groups.
Current allows you to discuss key topics with all your team members across your company. You can build special groups for areas of your project dedicated to that team. Everything is saved, so any comments or posts can easily be referred back to for clarity.
Currents has a home stream that keeps all relevant and important content top-of-mind by ranking relevance. You can follow tags on topics and even search for specific information within your thread.
Everyone with access to the Google Workspace platform can participate with Currents. It allows you to have meaningful engagement and collaborate easier than ever. Whether on desktop or mobile, there are no communication breakdowns in your project.
#3 – Use Group Email Lists
Depending on the size of the project, you may have multiple department heads and team members to collaborate with. This can become extremely tedious if you need to keep all of them up to speed on the dynamics of a project.
Google Workspace makes it easy to communicate with your entire team efficiently. How? By using one Gmail address that includes everyone involved with the project.
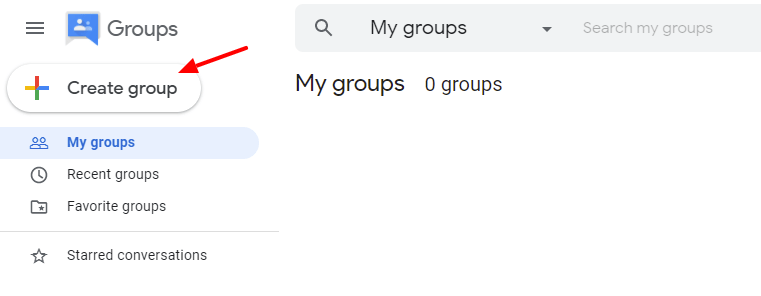
Start by signing into your Google Groups account, then in the upper left corner click on Create group. You will need to create a group name, the group email address you want to use, and a group description for the purpose for the group.
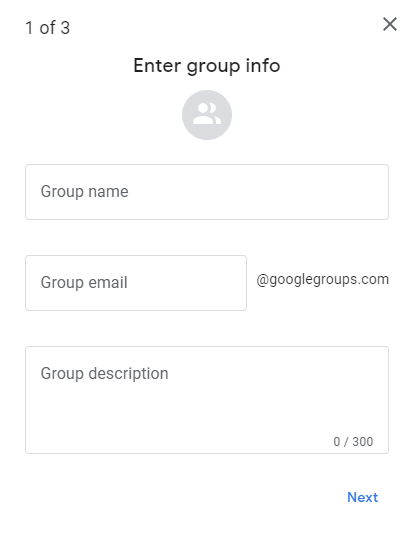
You’ll immediately be prompted to enter information about your new group.
- Group Name – Can be up to 73 characters long
- Group Email – Collaborative inbox for group members with permissions
- Description – General information about the group
When creating a group name, you choose something that makes it easy to identify the group’s purpose or how the group will be used. For example, you might create a group for a specific project or department.
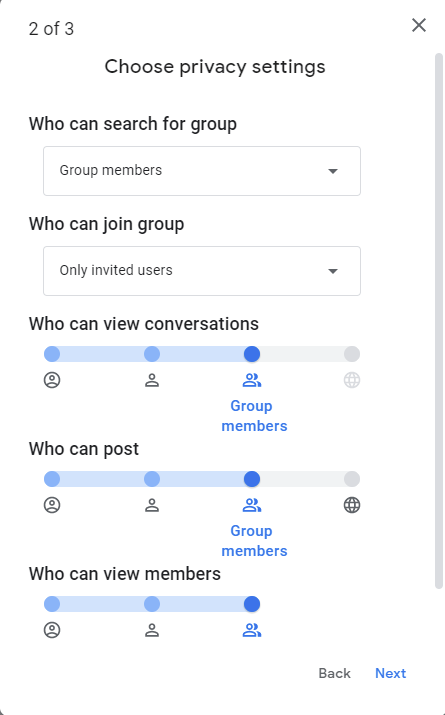
Next, you’ll need to establish the privacy and access settings for the group.
From your Google Admin console, you can control who can see the group, who can join it, who can see members, who can view conversations, and who can post in the group.
For the most part, you’ll want to set the settings to group members for almost all of these permissions. But depending on the structure of your team, you can potentially let members outside the group view conversations but not post anything.
Admins always have the option to add people to groups, regardless of the external membership settings you select here.
Then, follow the last step of adding your group members, creating your group managers, and adding your welcome message, then select Create group.
Special privacy settings and other group email options allow you to customize your email group even further. Learn more here.
#4 – Manage Your Team and Project Schedules
Now that you have your project plan set up and your group email up and running, you can move on to managing your team. This is easily done through shared calendars. The project calendars keep team members up to date while tracking deadlines and milestones.
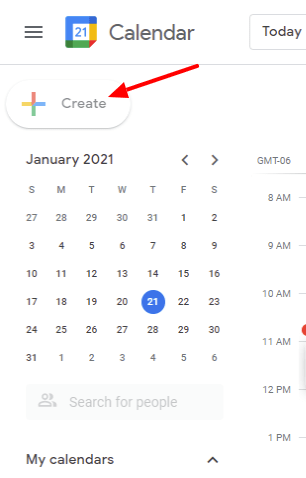
To get started, navigate to your current Google Calendar, then click on the button that says Create. Name your calendar, add a description, and select the time zone you want the calendar to reside in. Then, click Create calendar, under the My Calendars tab.
The My Calendars tab is where you will share it with your team. Click on the More tab, then click on Settings and sharing. Then, choose the option to share with individuals and add each team member or collaborator you want to share with.
#5 – Hold 1-on-1 or Team Meetings Over Video
This is an excellent feature to have and is one of the most important features in Google Workspace. We like Google Meet more than Zoom when you are making use of other aspects of Google, because of the seamless way Google Meet works with other Google apps.
Remote team members will feel more engaged through live video conferencing. Presentations can be shared over Google Meet while offering face-to-face interaction. And meetings can be started from your desktop, Android device, iPhone, or iPad.
We will go over the desktop/laptop guidelines for starting a Google Meet video call. It’s really easy to set up, and you can refer to our complete Google Meet review if you want more information.
First, create an event in your Google Calendar, which we went over earlier. Once you open a new calendar event, there is a big blue button that says Add Google Meet video conferencing.
Once you click that button a Join with Google Meet button appears. When your meeting is scheduled, your attendees will just click that button and they will be taken to the video call.
You can also start video calls from within Gmail and the main Google Meet page. There’s even the ability to start Meet calls from your Outlook.
Another extremely effective aspect of Google Workspace is the chat application. Google Chat is a great supplement for quick conversations or for sharing links and files with individuals.
#6 – Organize Your Team’s Preparation for Meetings
Nothing is more aggravating as a project manager than when people come to meetings unprepared. Your time is limited as it is, so you want to do all you can to make sure your team and others involved with the project have access to everything they need to be prepared ahead of time.
Google Calendar not only helps manage schedules for collaboration but it also lets people preview files that are relevant to your upcoming meeting. It makes it easy for everyone to come prepared to offer their contributions to the project, whether that be ideas or questions they have.
When you send your meeting invite, simply attach presentations, spreadsheets, docs, or any other items you want to add for discussion.
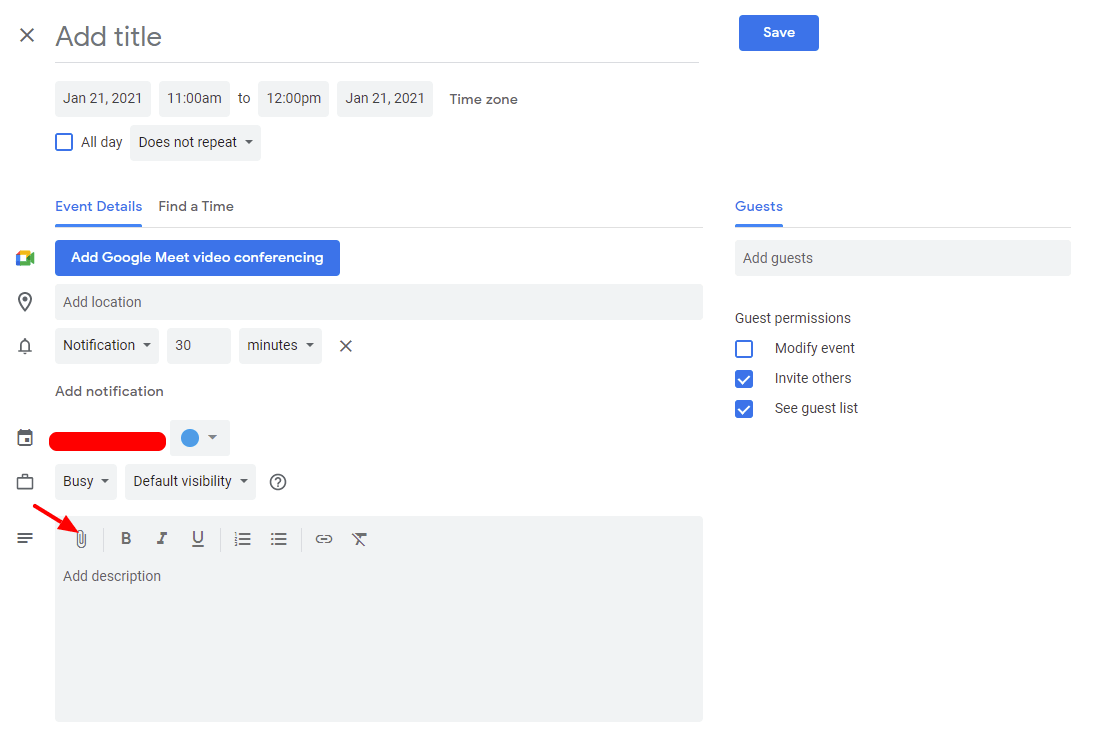
To start, go to your calendar in Google Workspace, click on +Create, then at the bottom of the modal box click on More options.
Then click the add details or add description field after you’ve filled out the event name. Here, you can insert details, contact info, any instructions you might have, and links for your appointment.
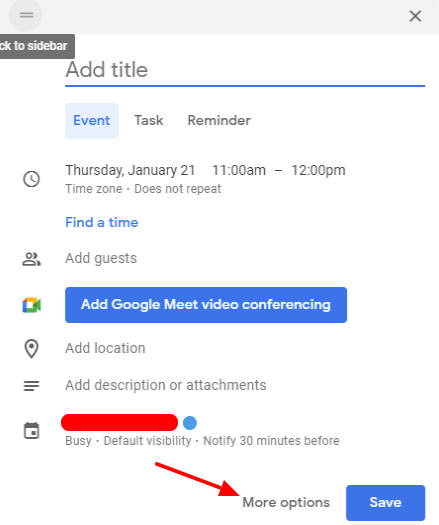
After that, you’ll want to add your attachments. Click on the paper clip icon just above where you wrote your description. It is the first icon in the description box. After you click that icon, find your document, image, or file and add it to your meeting invite.
#7 – Generate Documents and Collaborate on Them
When you are setting up the agenda for your meetings and working on other proposals for your project, you may need real-time collaboration on these items with others. Google Docs allows you to leave comments within the document for others to see, which allows for targeted suggestions to be made.
Edit documents in real time and even see revision history so you can tell who made what changes and when. This is extremely helpful because if you don’t like the changes, you can revert back to the original document or a previously cloud-saved version and start fresh.
All you need to do is create a Google Doc file. Then, once you have completed the document, click on the big blue Share button in the upper right corner and then enter the email address you want to share with.
You can control what viewers can do on the document, be it view, comment, or edit the file. To notify people automatically that you shared a document with them, just check the Notify people box.
It’s important to correctly share documents and provide permissions. If your team members cannot access the Google document because of incorrect sharing permissions, it could throw a wrench into your workflow efficiency.
#8 – Develop Impressive Presentations with Google Slides
There are times when you will want to create a presentation or deck in order to make things crystal clear for team members or clients.
Google Slides is an easy-to-use, cloud-based equivalent to PowerPoint. What’s also great is if you have a team that is remote, you have the ability to screen share with Google Meet so you can present a Slide to your distributed team.
All you do to get started is go to Google Docs, then click on the hamburger icon in the upper left corner. This will allow you to select Slides, bringing you to the main screen for the app. You can select a brand new blank presentation or click on the template library and use some of the general templates to get started that way.
The supersized benefit of this feature is the support you will find online about how to create slides. Google itself and the wider community of users can help you with managing and creating Google Slides.
#9 – Securely Share and Store Digital Assets
There are times when you need to store images, docs, and other files somewhere to share them with your team. Google Drive access control makes teamwork easy, simple, and protected.
What’s really great about this feature is that everything is synced to your cloud server, so you only need to store your file on Drive on one device and all team members can see the updated content you add.
When you are already using other apps from Google, selecting Google Drive as your preferred cloud storage option is simply a no-brainer. Google Drive is extremely easy to use for those who only want the basics, and it has plenty of advanced features for those who need more.
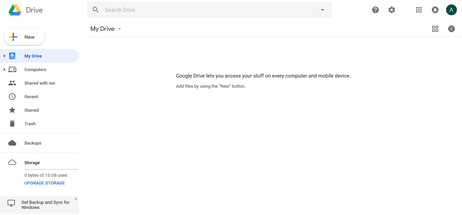
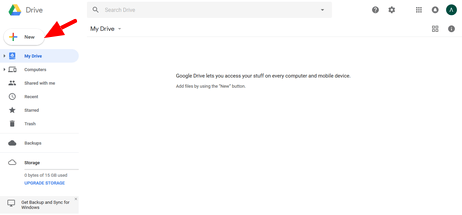
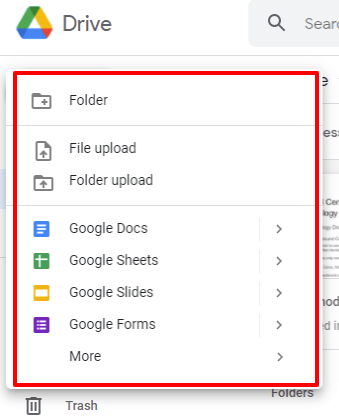
Store any file in Google Drive by finding the app in your Google account, clicking on +New, then uploading a folder or file.
Google Drive also works from your iOS or Android device. You are always able to share and store files on your Drive, which maximizes your team’s efficiency.
You can also use a separate digital asset management solution that syncs with Google Drive.
Next Steps
So, you may be asking yourself, “What’s next? How can I go farther in project management using Google?” And the answer is simple:
- Decide what Google Workspace plan is right for you
- Decide what Google apps you will need to use within your projects
- Use this guide to get more familiar with the apps listed here
There are 12 apps total that come with every plan of Google Workspace.
If you are struggling with any areas of project management, don’t you think it’s time to refine how you approach project management? Google Workspace will transform each area of PM and revitalize team communication, collaboration, and project efficiency virtually overnight.