Disclosure: This content is reader-supported, which means if you click on some of our links that we may earn a commission.
Want to end up higher in Google’s search results? Defining your keywords and meta descriptions for each of your posts in WordPress is a great way to step up your SEO strategy. If you’re new to WordPress or SEO, it might seem like a daunting task. But after you’re done reading this guide, you’ll be equipped with the knowledge necessary to define your keywords and meta descriptions for any post any time you want. Ready to get started? Let’s dive in.
Why Adding Keywords and Meta Descriptions in WordPress Is Worth It
Adding keywords and meta descriptions to your WordPress site helps Google rank your website better. This, in turn, means more traffic, which can lead to more sales and a growing audience. Keywords and meta descriptions let Google know what your site is about. By adding keywords to your site that people often search for, you allow those people to more easily find your website and its contents.
If you don’t make the effort to add the correct keywords and meta descriptions to your site, Google’s search engine won’t know how to properly classify and rank your site, and your audience won’t find your content. And what good is a website if nobody can find it?
A great meta description will reel in more of your target audience, as they read on your meta description and click on your post. A strongly keyworded post will rank higher in search engines, bringing more traffic and growing your site’s reach.
Adding meta descriptions to your website becomes easy through WordPress plugins. It’s simply a matter of finding a plugin that works for you and then making that plugin an integral part of your website’s maintenance.
The Investment Needed To Add Keywords and Meta Descriptions in WordPress
Thankfully, to add keywords and meta descriptions to your website, you don’t need to spend any money. You also don’t have to spend a ton of time, though you will need to invest some effort to set up, optimize, and maintain your SEO plugin.
With WordPress plugins, you don’t have to worry about knowing how to code or need any complex know-how to make keywords and meta descriptions work for you. Below, I outline the steps necessary to ensure your website is well keyworded and armed with strong meta descriptions.
8 Steps to Add Keywords and Meta Descriptions in WordPress
Let’s dive into the ins and outs of adding keywords and meta descriptions to your website.
#1 – Sign Up For WordPress Hosting
If you haven’t done so already, for a website to perform well in Google search results and have as much uptime as possible you want to ensure you have solid WordPress hosting you can count on.
Thankfully, we did the hard work for you and spent hours researching and comparing some of the best WordPress hosting solutions on the market. We recommend you check out our in-depth guide to the best WordPress hosting providers if you’re looking for new hosting options or looking to make the switch.
#2 – Download The Free Yoast Plugin

Configuring your site’s keywords and meta descriptions can be as easy as downloading a plugin that makes the process easy as cake.
With the free Yoast SEO plugin, a powerful tool designed to optimize the SEO of your site, you can easily add keywords and meta descriptions to your site’s pages and posts. From our point of view, Yoast is one of the most powerful SEO plugins out there and helps lots of sites, including our own, do well in SERPs.
To be fair, Yoast SEO isn’t the only plugin you can download to help you configure your website’s metadata, though it is certainly one of the best. The next best alternative we’d recommend is the All In One SEO plugin. It has great features and offers much of the same tools that Yoast does. It really comes down to which plugin you feel most comfortable using.
For now, let’s run through the rest of the process with Yoast as our example plugin.
Once you’ve downloaded, installed, and activated your Yoast plugin, it’s time to get your hands dirty.
#3 – Configure Your Plugin
In your WordPress dashboard, navigate to and click on Yoast on your left sidebar.
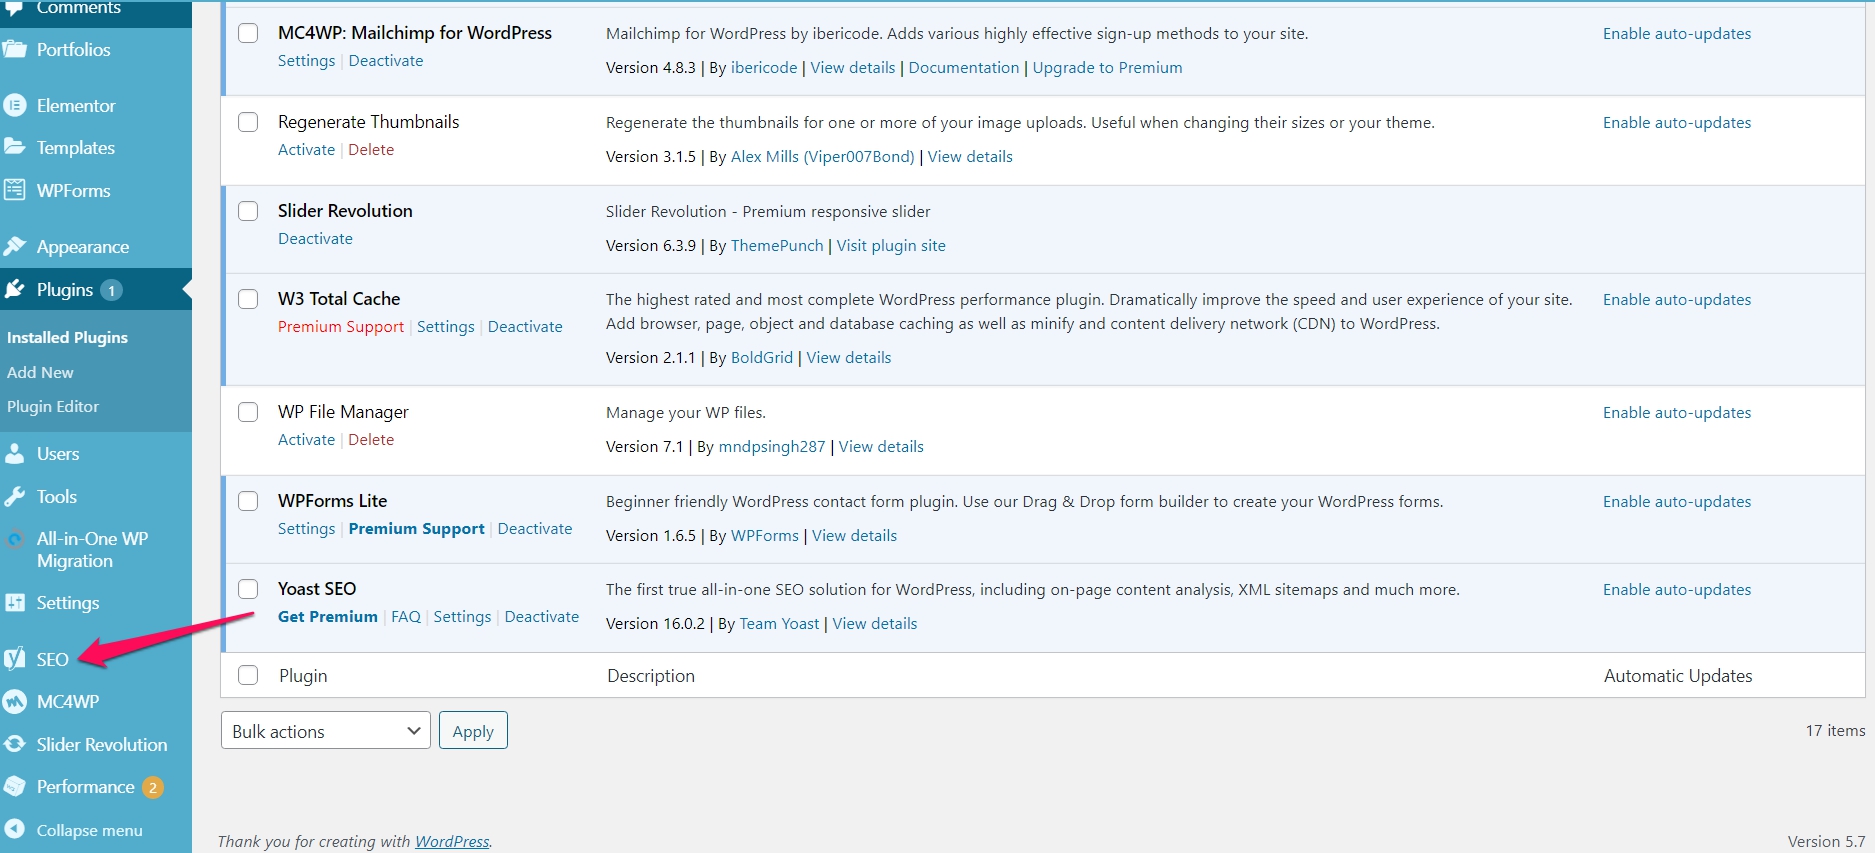
You’ll be met with a Yoast dashboard that’ll prompt you to start the Yoast SEO for WordPress installation wizard.
Once you click on it, you’ll be asked a number of questions about your site, including:
- Whether your website has been published or is under construction
- The type of website you’re creating
- Whether your site represents a person or an organization
- The type of website content you’d like to appear in search results
- If your site will have multiple authors
- How you want your site title to appear in search results
- Whether you’d like to allow Yoast to track your site’s data for research purposes
- Whether you want to sign up for the Yoast newsletter
Once you’ve answered each of these questions accordingly, the Yoast plugin will be installed and fully configured to your website. Now you’re ready to add keywords and meta descriptions to your site.
#4 – How To Add Keywords And Meta Descriptions To Individual Posts
When you’re wanting to add metadata to your existing or new blog posts, all you have to do is open the WordPress blog post editor for the blog post you want to modify. Once you scroll down, you’re met with a number of options.

In the Focus Keyphrase section, you can go ahead and add the keyword you’d like to rank for. This enables Yoast to comprehensively scan your post’s content to give you a content score. You can improve your content score to green once you’ve included the target keyword a healthy number of times and in key areas of your posts, including headers and post titles.
For instance, let’s say I type in “how to start a website” as my keyphrase. Once I scroll down, I’m met with a set of analysis results that I can read through and use to improve my existing content. Easy, right?

Going along with the same “how to start a website” example, let’s fill in our post’s meta description.

You’ll see your meta description bar turn green once you’ve entered a good meta description that won’t get cut off in Google’s search results. You can see a preview of what your meta description might look like at the top.
Want an SEO pro tip? When writing the meta description of your posts, you’re describing what your post is about. Make sure you make that description as clear and enticing as possible, that way you earn more clicks when people find you on search engines. This will help you rank higher in search results.
Also, always make sure you include your keyword as part of your meta description. In this case, we’ve included “how to start a website” in the beginning of the description for good measure.
When you’re finished, always make sure you click on Update to save your changes.
#5 – How To Add Keywords And Meta Descriptions To Your Website’s Pages
If you’ve been using WordPress for a while, you know there’s a difference between a page and a post. Though, updating the keywords and meta description of a page is pretty similar to the way you update your posts.
You’ll want to open your desired page from under the Pages section in your WordPress dashboard, scroll to the bottom, and find the Yoast plugin areas where you can fill in your keyphrases and meta descriptions, much like you would with a post.
Once you’re satisfied with the changes you’ve made, be sure to hit the Update button.
#6 – How To Add Keywords And Meta Descriptions To Your WordPress Categories
Now, how do you add keywords and meta descriptions to your website’s category pages? Much like adding keywords and meta descriptions to your posts and pages, from your WordPress dashboard, navigate to Posts, then Categories.
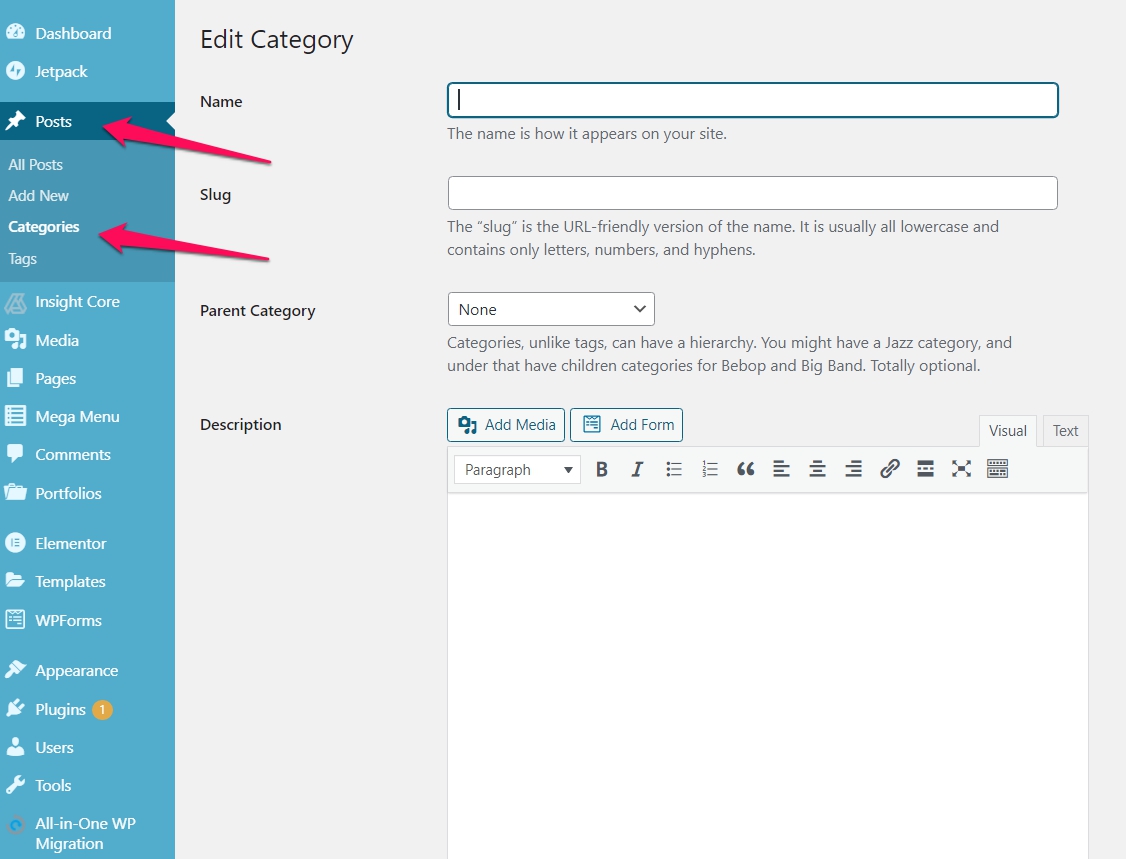
Once you scroll to the bottom, you’ll see the Yoast SEO plugin, where you can fill in the corresponding keywords and meta descriptions and hit Update to save your changes.
#7 – How To Add Keywords And Meta Descriptions To Your WordPress Homepage
Did you know there’s a way to add a meta description to your homepage that perfectly describes what your site is about? Read on to learn how with Yoast.

To add keywords and a meta description to your website’s homepage, from your dashboard, you’ll want to navigate to Yoast, Search Appearance, then under Homepage you can fill in your meta description along with your set of keywords.
When you fill out your homepage meta description, remember to be clear about the purpose of your site and what you offer. You also want to naturally work in a main keyword or two. This way Google can classify and rank your site accordingly.
Once you’ve updated your meta description, remember to hit Save Changes at the bottom of your dashboard. Your new meta description won’t show up right away if you decide to search for your site on Google. You’ll need to give it a few days for Google to crawl your website and update your newly made changes.
#8 – Optimizing With Keywords Beyond The Yoast Plugin
So you’ve learned how to add keywords and meta descriptions to your WordPress site using the free Yoast SEO plugin. How else can you add keywords in WordPress?
Optimizing your website for keywords goes beyond using the free Yoast SEO plugin, though it’s a good place to start. To truly optimize your WordPress content, you’ll want to add keywords throughout. Here are a few key places you can add keywords in your content:
Add keywords to subheadings
Keywords don’t just go in your Yoast plugin. While adding keywords to your meta descriptions are an absolute must, it’s also important to include them in key sections of your content like in at least one or two of your subheadings. This helps Google classify and rank your content accordingly.
Add keywords to titles
Another great place to add your keywords to optimize for search engine results? In your title. Adding keywords in your content’s title naturally helps your click-through rate and also serves as an SEO signal to Google letting it know that your content is valuable and can answer a search query accurately.
Add keywords throughout content
As mentioned above, you want to sprinkle in your keywords throughout your content. Adding keywords to your WordPress website through Yoast, while helpful, is not enough to help you rank in search results. Adding your target keywords throughout your content naturally can help up your SEO rankings. It sends signals to Google that your content is worth ranking on search engines because it accurately and thoroughly answers a search query.
Add keywords in image alt descriptions
Finally, another key place to add keywords is your image alt descriptions. Image alt descriptions help Google determine what your in-content images are about. The better keyworded your image alt descriptions are the better Google can classify what they are. With accurate and keyworded alt image descriptions, the quality of your content’s SEO will increase.
Next Steps
Adding keywords and meta descriptions to your site’s posts and pages can be a great step towards better on-page SEO. With Yoast, it’s easy to update your site’s keywords and meta descriptions in a few easy steps.
At Crazy Egg we’re always learning, which means we also like to share the best of what we find, including a ton of content on creating the best ecommerce WordPress themes, finding the best WordPress hosting, or even learning about the best SEO tools for your website so you can up your search engine rankings and gain more website traffic. Next, you can also read about how to start a blog that makes money.